
Hello there!
I'm back to share a mixed media album I've been working on with LDRS Creative for my cruise project last May! At first, I really wanted to challenge myself with a sentiment-only project, and then it became something else completely when I tried it in a mixed media way. I'll try to walk you through the steps of making the cover of the mini-album, where you can see a few sentiments from the Just Because set. I selected them because it will be filled with memories from my friend and I when completed.
SO, the first step is to cut all your chipboard sheets to 7"x5" or whatever size you'd like, the number of sheets depending on your purpose for this album. I thought this one would fit perfectly with pictures to commemorate a longtime friendship! After that, punch two holes on the left side. Then, with a stencil and a knife, add some modeling paste to create the background.

Don't hesitate to scrap down a few spots, to remove the "perfectly well-done" look ;-) This is mixed media!

Next, glue a few embellishments from your stash. Don't mind the colour and don't hesitate in cropping them with your scissors. I even used a plastic wheel from my adhesive gun, eheh! Remember that heavy objets will need stronger adhesive.

Cover everything with gesso and let dry.

When everything is completely dried, mist away with spray colours!

While drying once again, stamp your sentiments on white cardstock. Then, take out some black ink with a sponge dauber and ink the edges.

You can also ink the edges of your chipboard panel when completely dried.

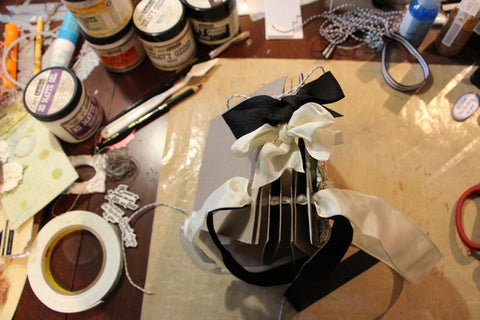
Last step is to bind all panels with some ribbons...

...and to tie a big bow!
And the final result! Now all you need is to complete the other pages and give it to a loved one :-)

2 commentaires
C'est MAGNIFIQUE !
wow j'adore te voir faire du mixed media toi c'est superbe
Publier un commentaire